Healthy Butterfingers
Indulge Without the Guilt: A Recipe for Healthy Homemade Butterfingers
Craving the irresistible crunch and rich flavor of Butterfingers but looking for a healthier alternative? Look no further! This recipe for Healthy Homemade Butterfingers provides all the satisfaction of the classic candy bar without the guilt. Packed with wholesome ingredients and free from artificial additives, these homemade treats are sure to become a staple in your snack rotation.
Enjoy!
xoxo
SiLLibake

Healthy Butterfingers
Indulge Without the Guilt: A Recipe for Healthy Homemade Butterfingers
Healthy Butterfingers
Why Homemade Butterfingers?
While traditional Butterfingers may be delicious, they often come loaded with processed sugars, unhealthy fats, and artificial flavors. By making your own at home, you can control the quality of ingredients, ensuring that you're indulging in a treat that's not only tasty but also nourishing for your body. Plus, crafting these bars from scratch allows you to customize the recipe to suit your dietary preferences and restrictions.
Why You'll Love These Healthy Butterfingers:
Wholesome Ingredients: Made with natural sweeteners, nutrient-rich peanut butter, and option of fiber-packed cereal, these bars offer a healthier alternative to store-bought candy bars.
Customizable: Feel free to experiment with different cereals, nut or seed butters, and sweeteners to create your perfect version of this recipe.
Easy to Make: With just a handful of ingredients and simple steps, you can whip up a batch of these homemade Butterfingers in no time.
Indulge your sweet tooth without compromising your health with these delectable Healthy Homemade Butterfingers. Once you try them, you'll never go back to the store-bought version!

Healthy Butterfingers
Yield 16 Square
Healthy Butterfingers
Indulge responsibly with our Healthy Butterfingers recipe, crafted with wholesome ingredients for a guilt-free treat that satisfies your sweet tooth.
Ingredients:
· 1/4 cup pure maple syrup, honey, or agave
· 1 tbsp regular or blackstrap molasses
· 3 1/2 tbsp sugar, unrefined if desired, or additional maple syrup (I used maple syrup)
· 1 cup peanut butter or allergy-friendly substitute
· 1 1/2 cups bran flakes or corn flakes, or another flakey cereal (I used Nature's Path Organic Honey'D Corn Flakes)
· 1/8 tsp salt, plus a little extra if using unsalted peanut butter
Directions
Prepare the Sweetener Base:
- In a small saucepan, combine the maple syrup (or honey/agave), molasses, and sugar.
- Heat the mixture over medium heat, stirring constantly until it reaches a gentle boil.
- Allow it to boil for about a minute, then remove it from the heat.
2. Create the Peanut Butter Mixture:
- Add the peanut butter and salt to the saucepan containing the sweetener base.
- Stir vigorously until the ingredients are well combined and form a smooth paste.
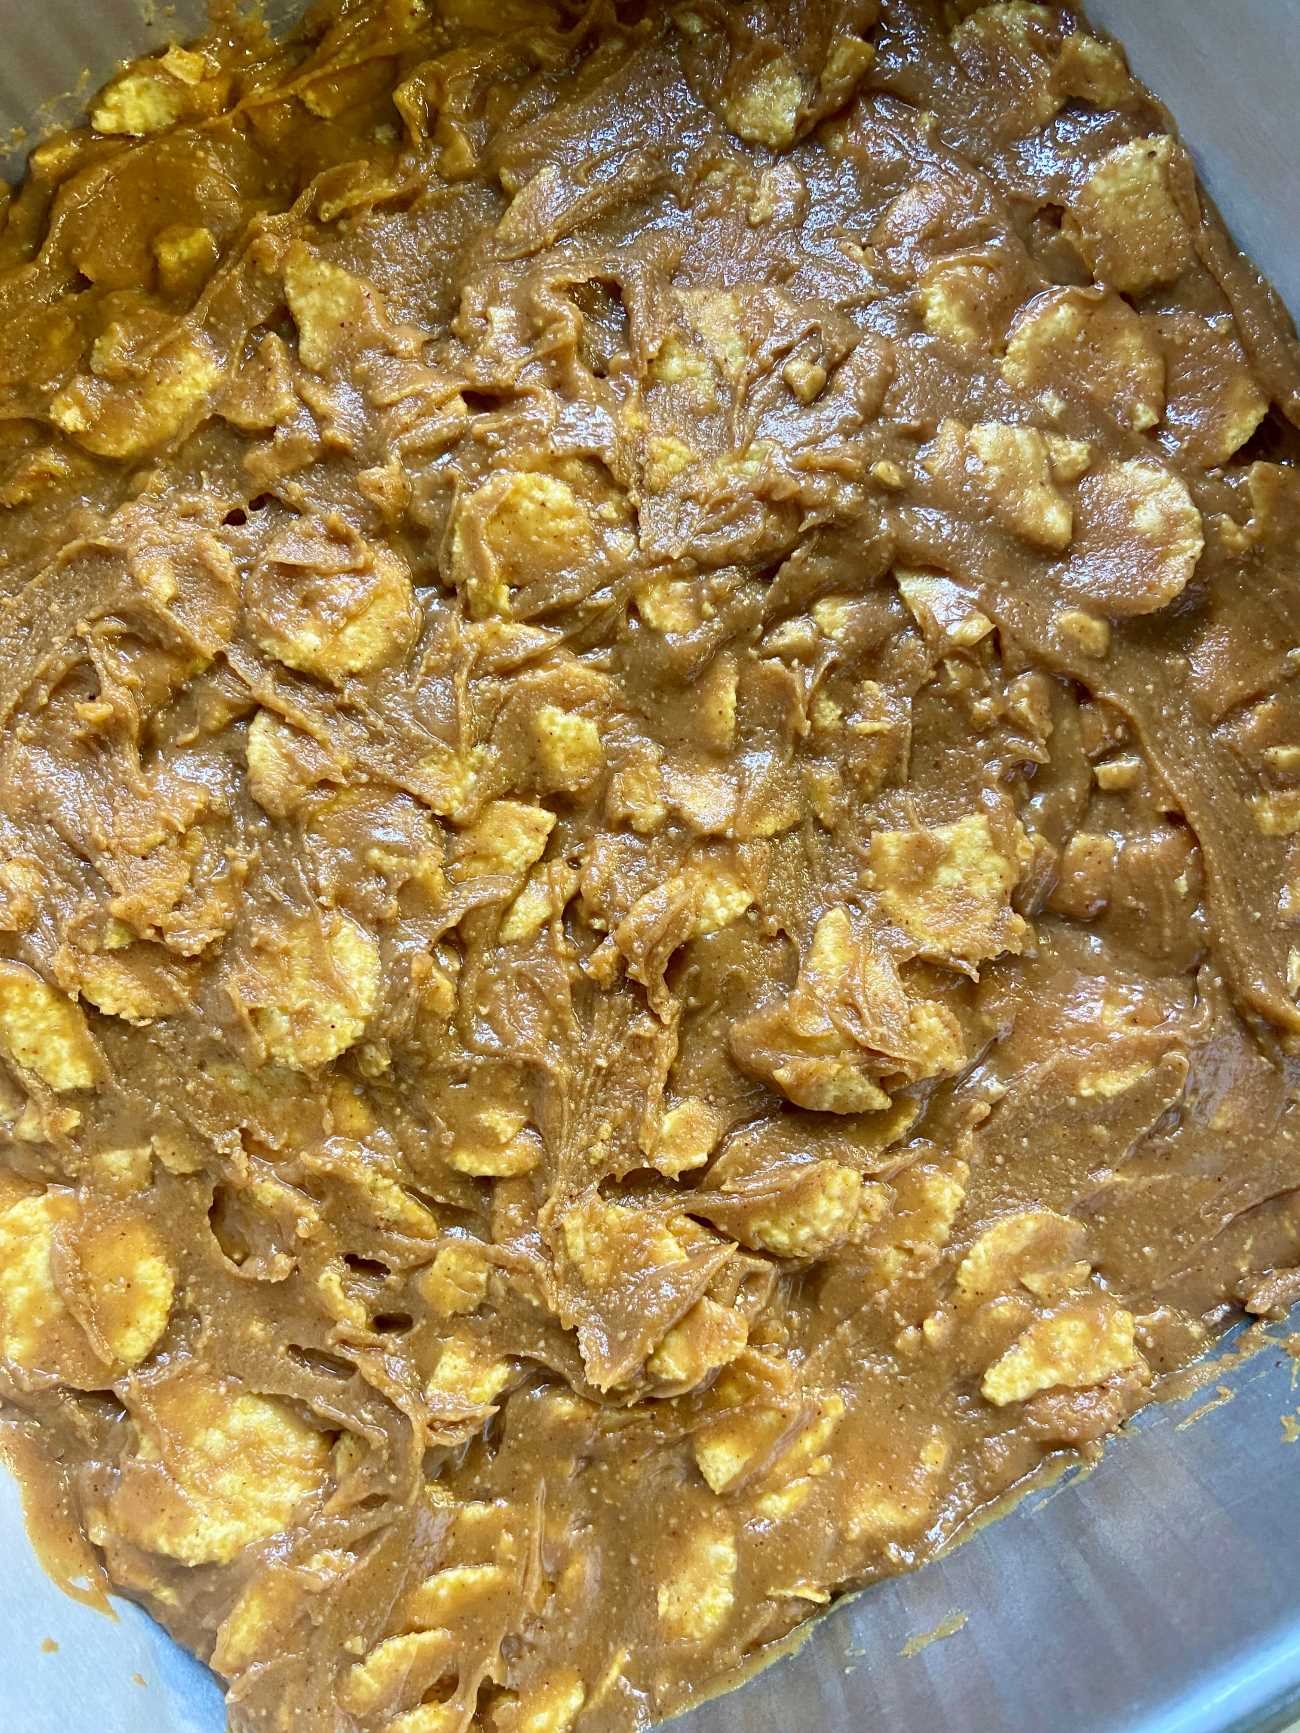
3. Incorporate the Cereal:
- Add the corn flakes or bran flakes to the peanut butter mixture.
- Stir gently until the flakes are evenly coated with the peanut butter mixture, taking care not to crush them too much.
4. Shape and Chill:
- Line an 8x8 inch pan with wax or parchment paper, or grease it lightly.
- Transfer the mixture into the prepared pan, pressing it down firmly and evenly.
- Place the pan in the freezer and allow the mixture to firm up for at least an hour, or until completely hardened.

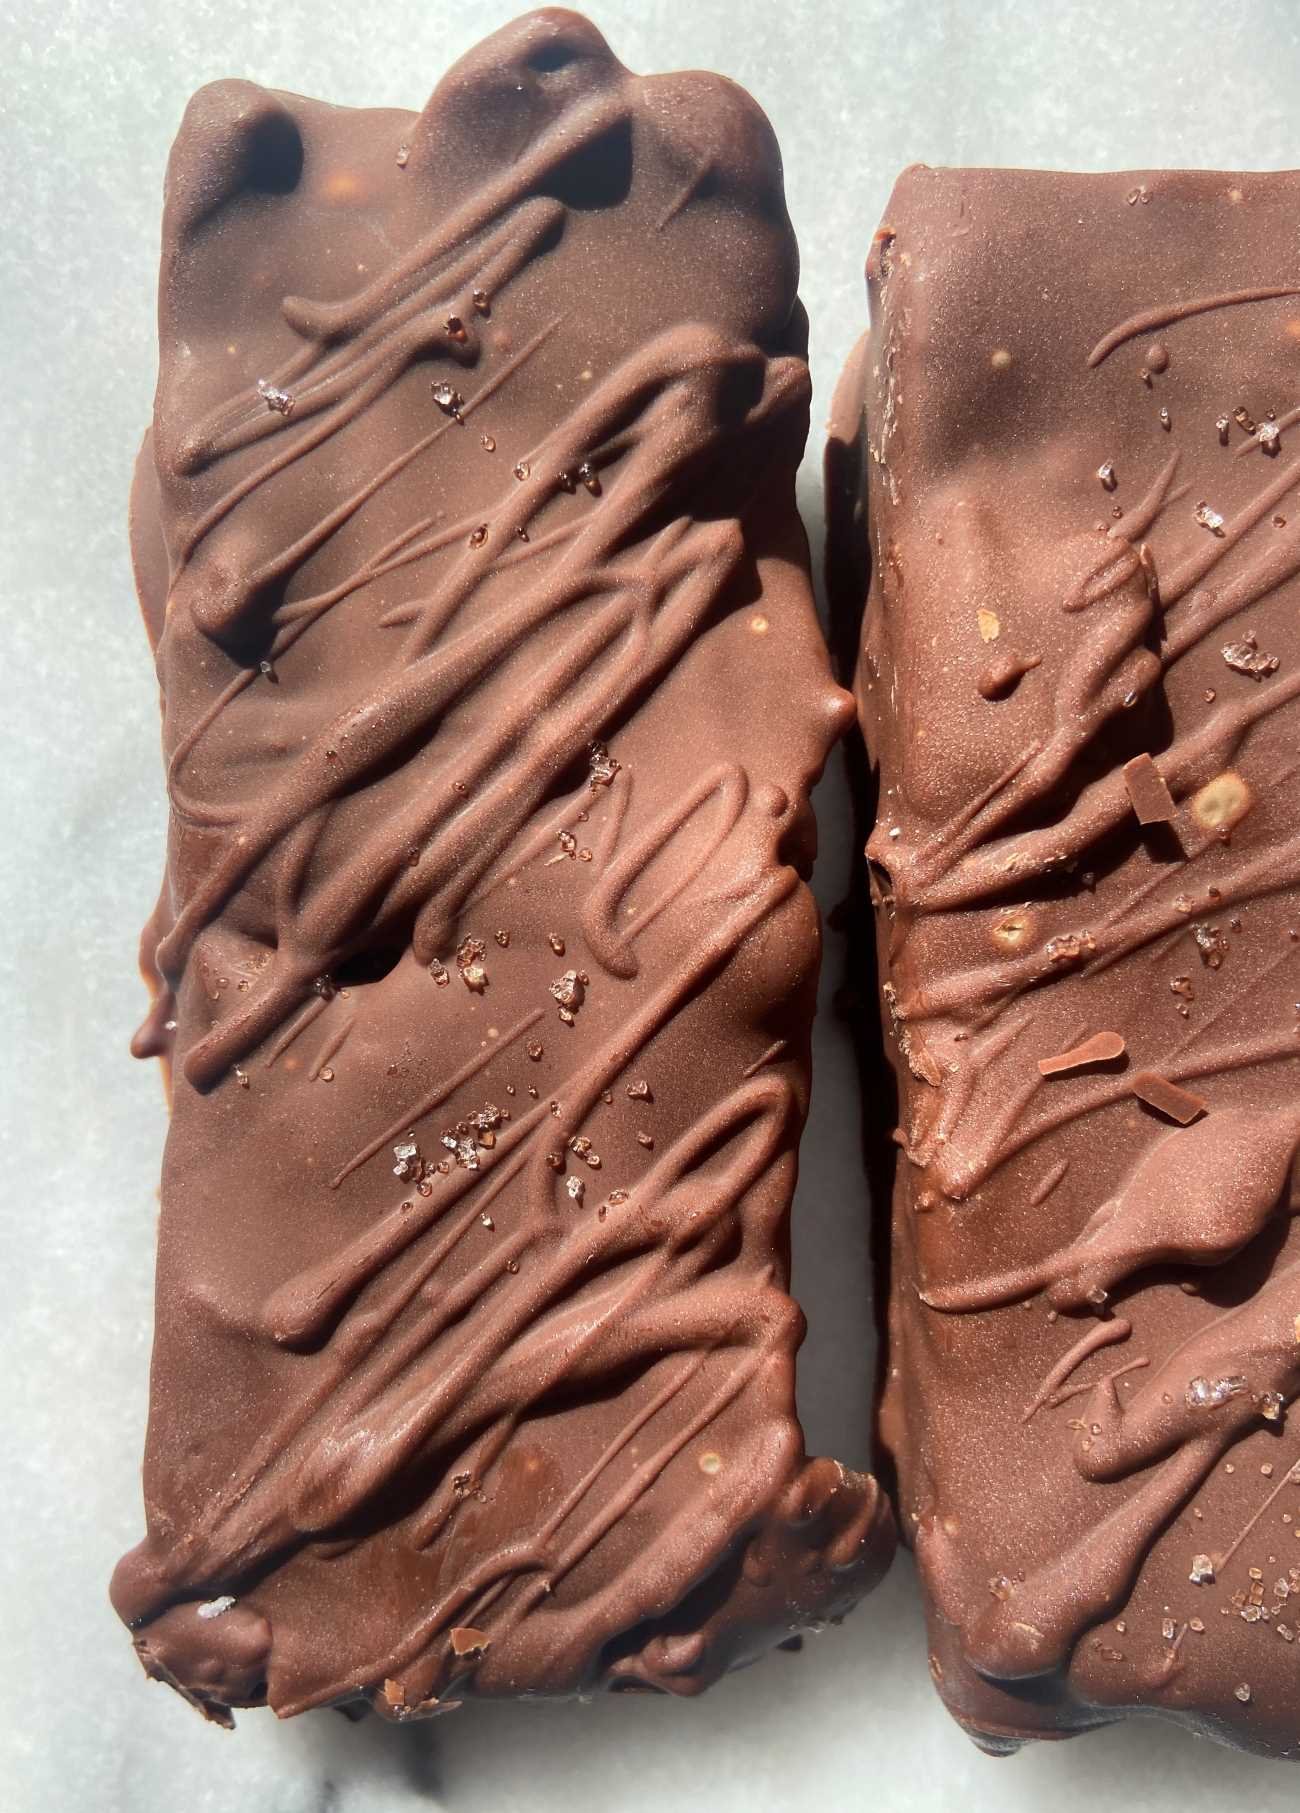
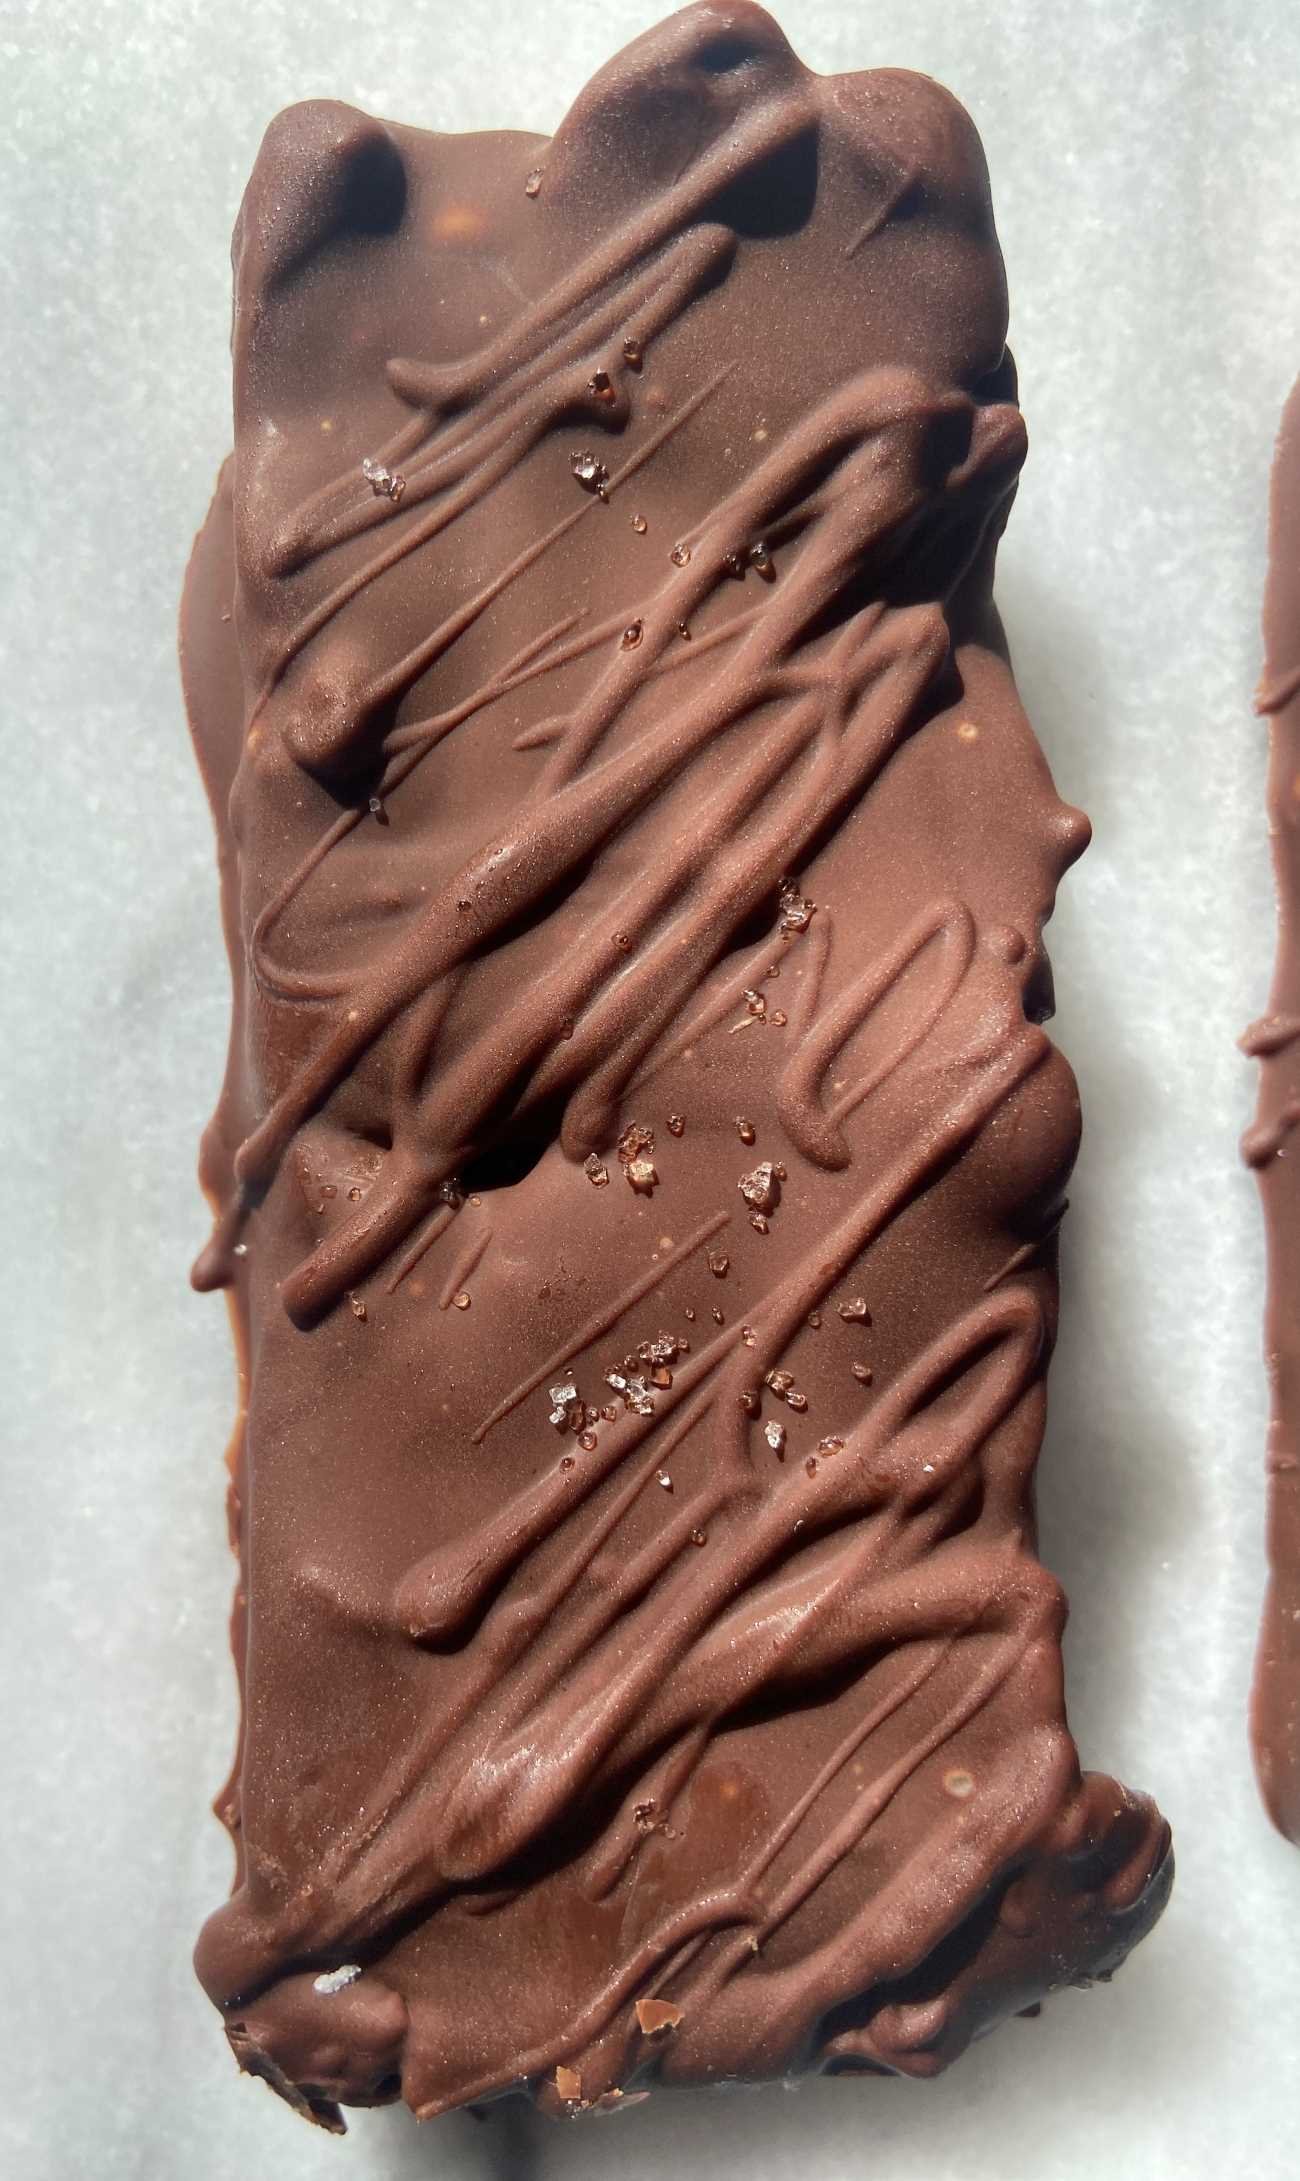
5. Optional Chocolate Coating:
- If desired, melt the chocolate chips and coconut oil together using a double boiler or microwave, stirring until smooth.
- Dip each bar into the melted chocolate, ensuring that it is evenly coated. Sprinkle with flaky sea salt.
- Place the chocolate-coated bars back in the freezer to set for an additional 10-15 minutes.
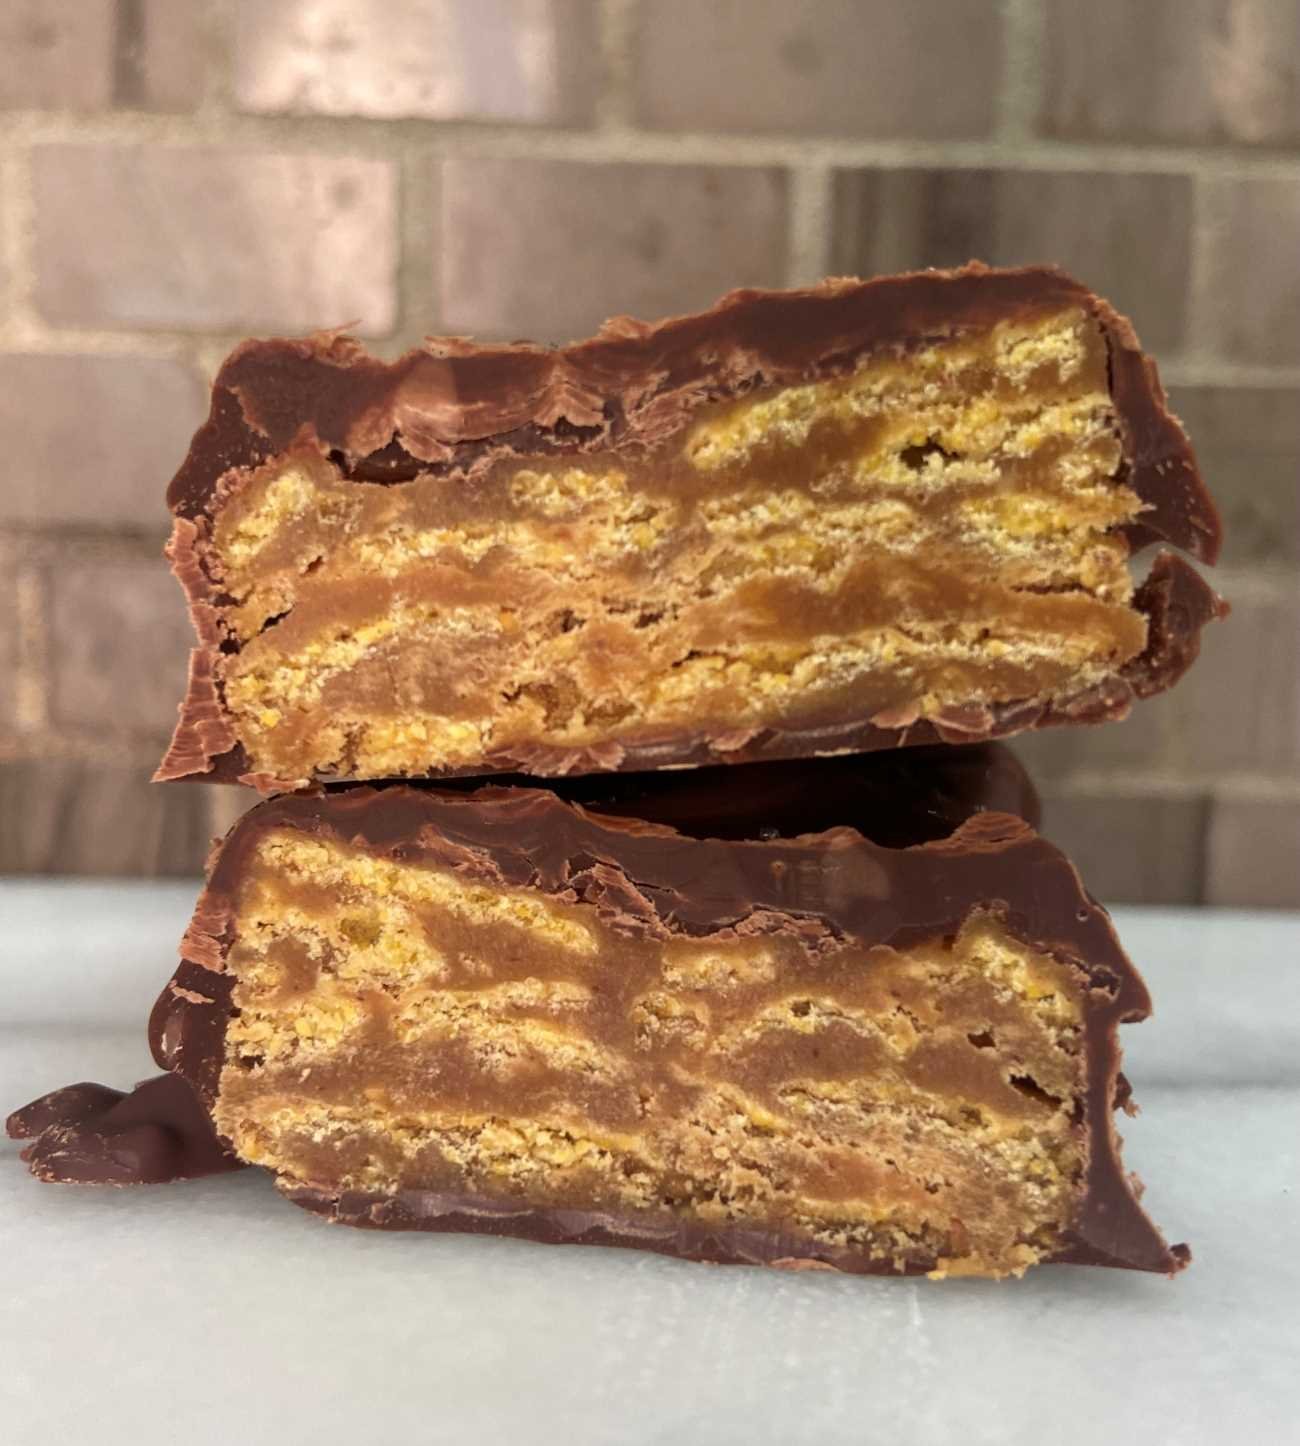
6. Serve and Enjoy:
- Once the chocolate coating has hardened, remove the bars from the freezer.

- Cut them into individual servings and enjoy the delicious crunch and flavor of homemade Butterfingers!

Storage and Freezing Guidelines:
Store in freezer up to three months. Eat as frozen treat or thaw for 10 min before enjoying.